
Before you start, makes sure that you have:
- Installed, wifi-connected HiKVision camera. You should be able to configure your camera from your Hikvision iVMS4200 Software. Make sure the camera is connected to the VMS and you can see the live streaming.
- Account ID: You should receive the Account ID from your sales representative. You also can find your Account ID from Sentry Portal after logging in.
The installation process should normally take around 5-7 minutes. Please contact Hikvision’s support in case you run into issues.
The following are the instructions for Hikvision.
Verify Sender email in Sentry Portal
STEP 1: Activate Sentry AI portal log in
At the time your Account ID is created, you should receive an invitation to Sentry Portal at your assigned email address under the subject “You have been invited to Sentry Portal”.
Follow the link in the invitation to register your Sentry portal login.
Check your email to verify your account.
STEP 2: Verify your sender email for SMTP connection with your HikVision
After creating the Sentry Portal account successfully, log in and start the Account setting from the Admin panel.

Choose SMTP connection and register the sender email address that you will use to connect with your Hikvision system. For example youremail@yourcompany.com

Configure Email sending
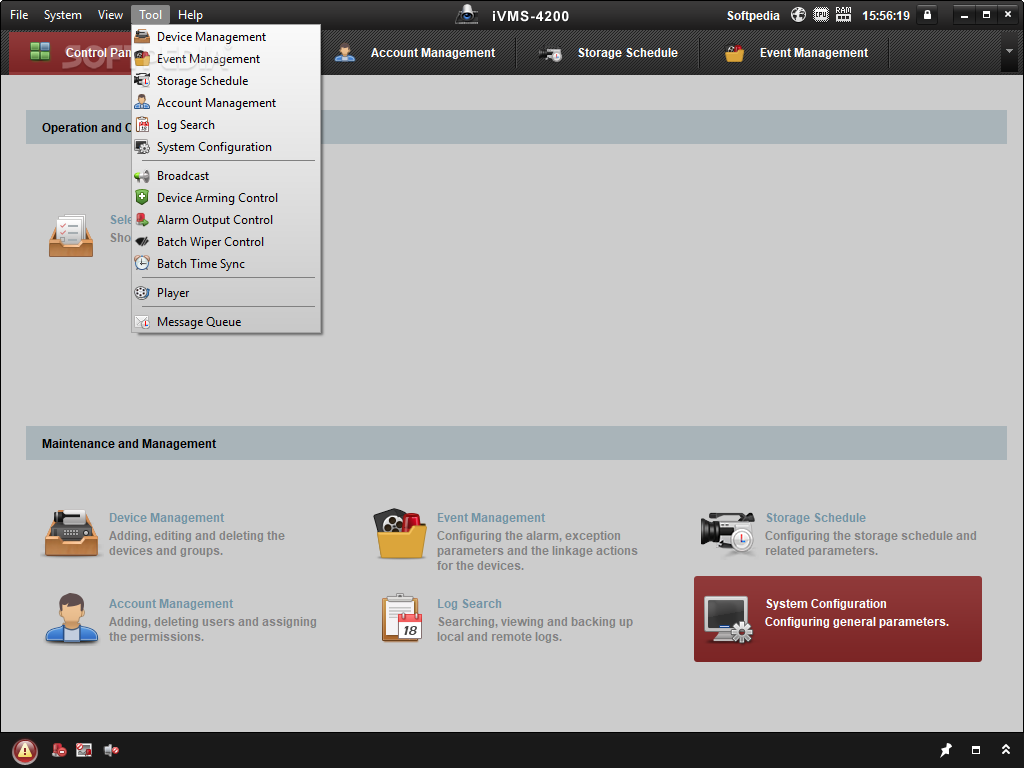
STEP 3: On the home screen Control Panel as below, be ready to launch System Configuration, Event Management and Device Management for local configuration.
STEP 4: Select System Configuration and set up the email Parameters. TEST (Click “Send Test Email”) to ensure your connectivity parameters are set correctly. SAVE the settings.
| SMTP Server | smtp.gmail.com |
| Encryption Type | STARLTLS |
| Port | 587 |
| Username | <Your email address> |
| Password | <Password of above email address> |
| Sender | youremail@yourcompany.com |
| Receiver | image@smarthomesentry.biz |

STEP 5: Select Device Management and make sure the camera device appears in the list.

STEP 6: On the Main View, make sure you can see the live view of your camera.

STEP 7: Select Event Management from the Control Panel. Camera Event screen as below comes up. Ensure Motion Detection is enabled, the correct camera is selected as below, and SAVE the configuration.

STEP 8: From Device Management window, launch “Remote Configuration” for the particular camera. Optionally, select “Remote Configuration” from the right click menu of the camera from the main menu. (See picture below).

STEP 9: Under the General tab, enter the camera name (as in the picture above) in the format: Account_ID__Camera Name with double dash before the Camera Name ((e.g., SUZ0G2X-P__IP Camera) and Save. This step is critical as it helps to identify the email headers for Sentry processing.
STEP 10: Under
Make sure the Triggered Camera is selected below. Select the whole area as the region for Motion Detection Activation. Increase Sensitivity to Max (100%). SAVE the settings. See picture below

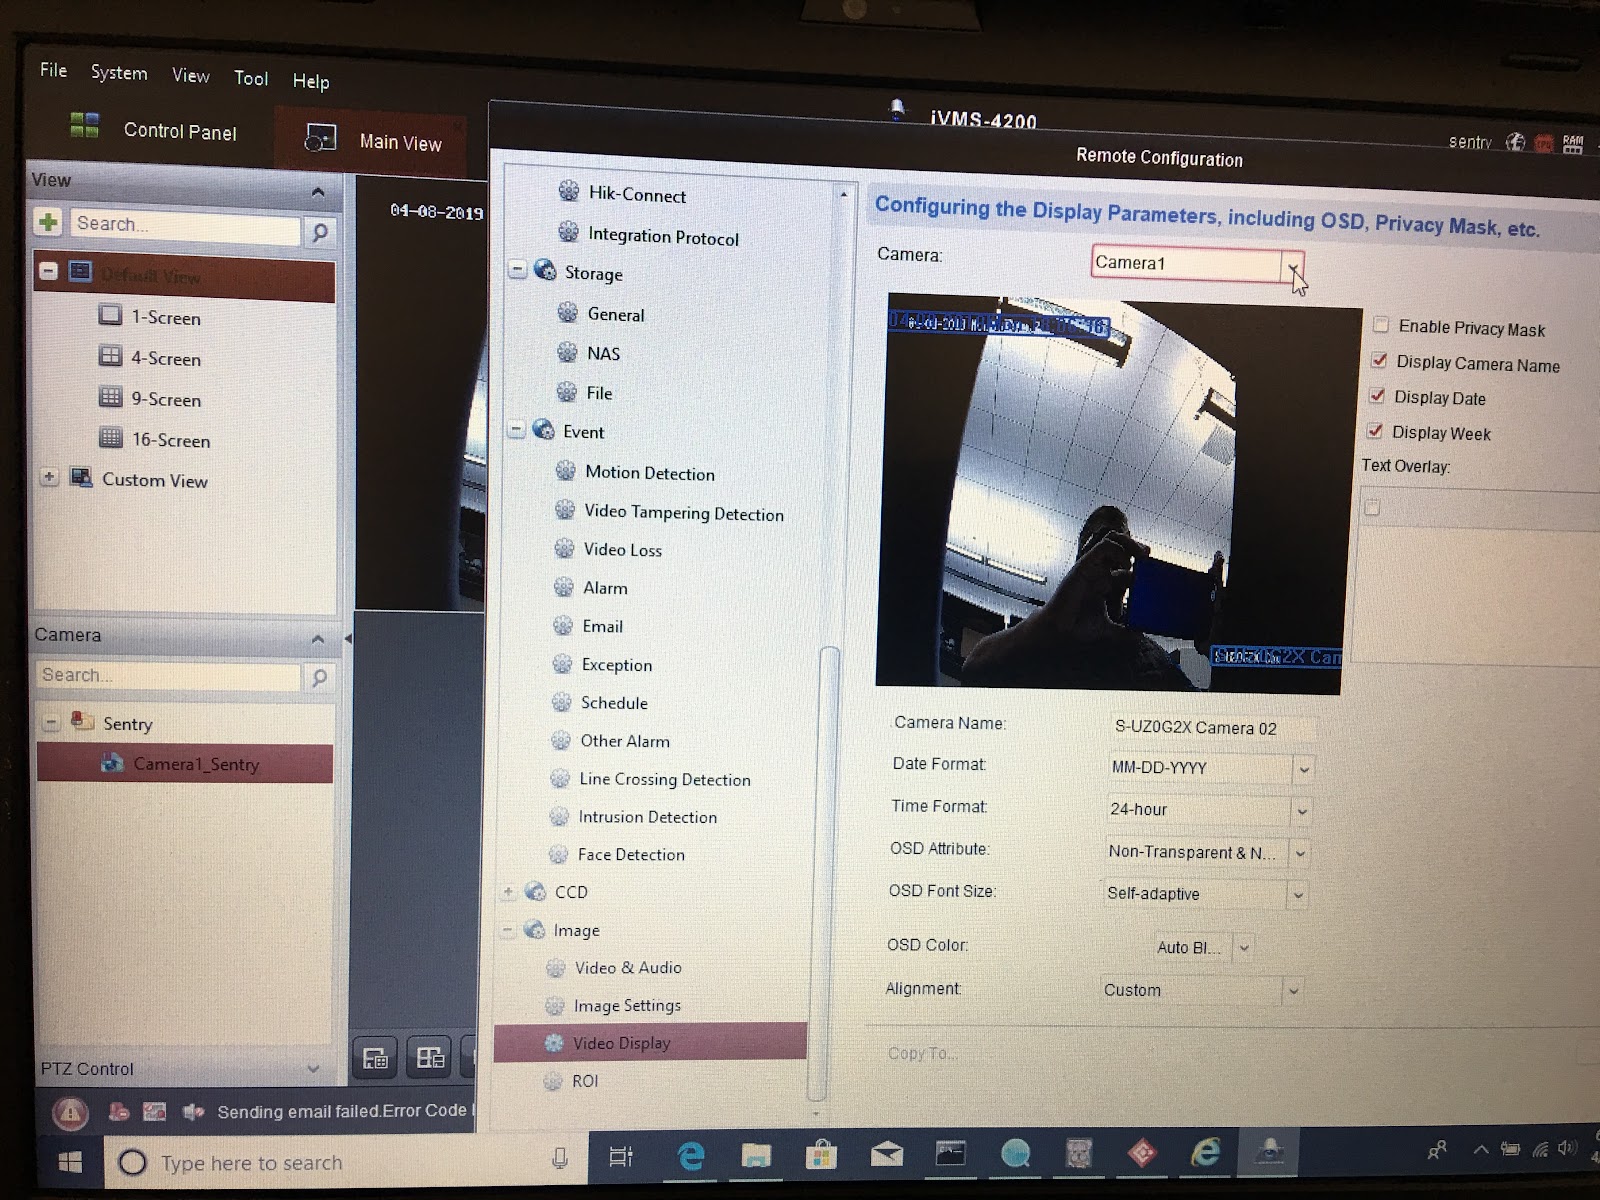
STEP 11: Under Image/Video Display tab, select the camera of interest, make sure the ‘Display camera name’, ‘Display date’, ‘Display week’ are selected. See pic below. Please include Account ID in the camera’s name similar in STEP 9 (e.g., SUZ0G2X-P__IP Camera), SAVE the settings.
STEP 12: Under Event/Email tab, fill up your user name(sender’s email address), password(sender’s email address password), check the ‘Server Authentication’ box. You can use any email id from your mail system, say youremail@yourcompany.com (The email should be registered with Sentry Portal at Step 2) . See pic below
Under the same tab, make sure the recipient’s email address is ’image@smarthomesentry.biz’. You may add additional email IDs optionally for receiving image copies and troubleshooting purposes.
c. Under the same tab, make sure the ‘send attachment’ is selected.
If you used a gmail account as a sender for testing purposes (e.g., jose@gmail.com), please use these settings:
| SMTP Server | smtp.gmail.com |
| Server Authentication | On |
| Send Attachedment | On |
| Encryption Type | STARLTLS |
| Port | 587 |
| Username | <Your email address> |
| Password | <Password of above email address> More details on App password in Gmail |
| Sender | youremail@yourcompany.com |
| Receiver | image@smarthomesentry.biz |
Enable Gmail processing
If you use Gmail to send and receive Sentry AI Alerts, you need to generate an App password to use for SMTP setting. Details here.
Check the connection
Once you have completed these steps, you should start receiving notifications from Sentry AI. Try moving in front of the camera to test the setup. If you are not receiving Email/Whatsapp alerts, please contact Sentry Support.